


This directory contains a Model Context Protocol (MCP) server designed to allow AI agents within Cursor to interact with Jupyter Notebook (.ipynb) files. It was created to overcome a limitation with Cursor. As of version 0.50.5, in Agent mode, the model could not edit notebooks or notebook cells in response to dialog in the AI chat pane. This provides the agent with a suite of MCP tools that allow direct notebook cell manipulation.
Although designed to overcome a limitation with Cursor, this MCP server does not have anything specific to Cursor other than the configuration instructions. You could easily configure this for use with VS Code (Insiders) or Claude Code or any model/agent that can take advantage of MCP. Note that VS Code (Insiders) has pretty good Jupyter Notebook support now.
This MCP server uses the nbformat library to safely manipulate notebook structures and enforces security by restricting operations to user-defined directories. It also uses nbconvert to enable exporting notebooks to various formats like Python scripts, HTML, and more. The server handles all notebook operations through a clean API that maintains notebook integrity and prevents malformed changes.
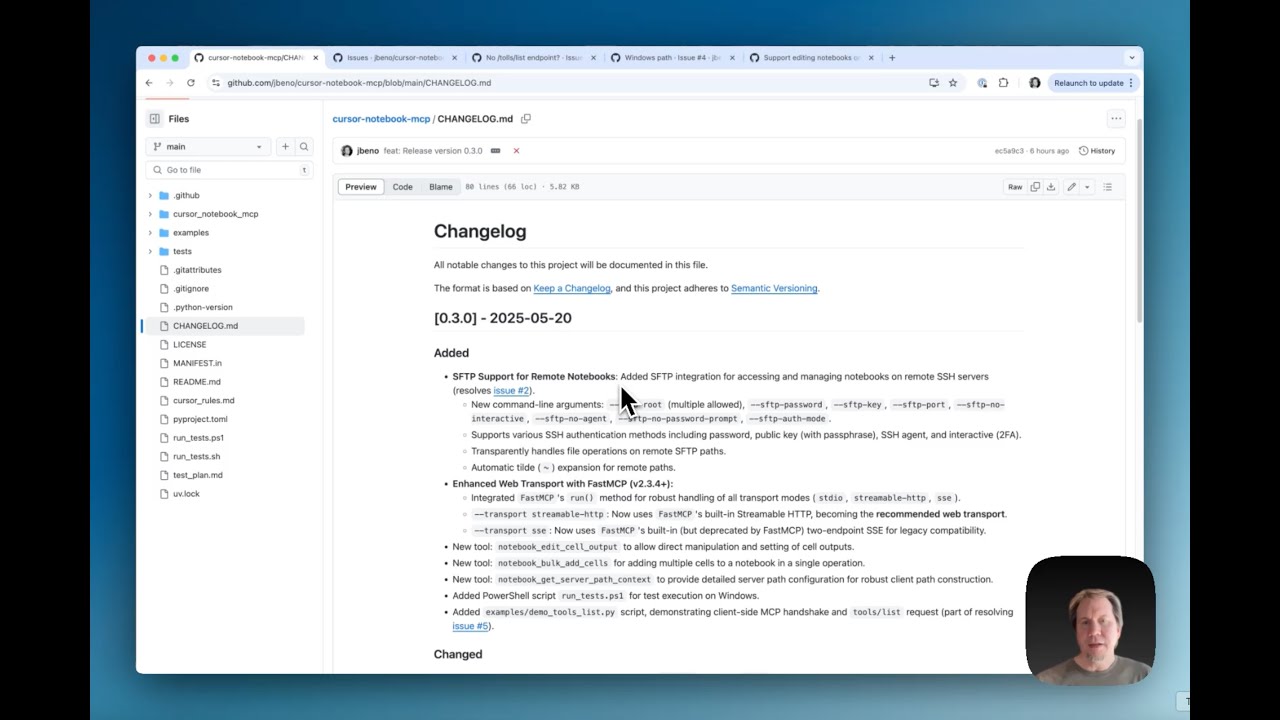
Current Version: 0.3.0 - See the CHANGELOG.md for details on recent changes. Key additions include SFTP support, Streamable HTTP transport, and new tools like notebook_edit_cell_output, notebook_bulk_add_cells, and notebook_get_server_path_context to improve notebook editing and path handling.
Notebook MCP Server 0.3.0 Update (YouTube)
- Updates in the 0.3.0 release, overview of new tools
- FastMCP upgrade with streamable HTTP transport
- SFTP support for editing Jupyter notebooks on remote SSH servers,
- Issue resolution (#2, #4, #5) plus known issues (#1, #3)
Overview of Notebook MCP Server (YouTube)

- The current limitations of editing notebooks directly in Cursor.
- Installing and configuring the Notebook MCP Server.
- Creating a notebook from scratch (example shown: Singular Value Decomposition tutorial in less than 2 minutes).
- Demonstrating various editing tools (edit, split, duplicate cells).
- Reading notebook metadata.
- Exporting notebooks to python
Exposes the following MCP tools (registered under the notebook_mcp server):
notebook_create: Creates a new, empty notebook file.notebook_delete: Deletes an existing notebook file.notebook_rename: Renames/moves a notebook file from one path to another.notebook_read: Reads an entire notebook and returns its structure as a dictionary.notebook_read_cell: Reads the source content of a specific cell.notebook_add_cell: Adds a new code or markdown cell after a specified index.notebook_edit_cell: Replaces the source content of a specific cell.notebook_delete_cell: Deletes a specific cell.notebook_change_cell_type: Changes a cell's type (code, markdown, or raw).notebook_duplicate_cell: Duplicates a cell multiple times (default: once).notebook_get_cell_count: Returns the total number of cells.notebook_read_metadata: Reads the top-level notebook metadata.notebook_edit_metadata: Updates the top-level notebook metadata.notebook_read_cell_metadata: Reads the metadata of a specific cell.notebook_read_cell_output: Reads the output list of a specific code cell.notebook_edit_cell_metadata: Updates the metadata of a specific cell.notebook_clear_cell_outputs: Clears the outputs and execution count of a specific cell.notebook_clear_all_outputs: Clears outputs and execution counts for all code cells.notebook_move_cell: Moves a cell to a different position.notebook_split_cell: Splits a cell into two at a specified line number.notebook_merge_cells: Merges a cell with the cell immediately following it.notebook_validate: Validates the notebook structure against thenbformatschema.notebook_get_info: Retrieves general information (cell count, metadata, kernel, language info).notebook_export: Exports the notebook to another format (e.g., python, html) using nbconvert. Note: See External Dependencies below for requirements needed for certain export formats like PDF.notebook_get_outline: Produces an outline showing cell numbers with major headings/functions and line counts to make it easier for the agent to navigate a large notebook.notebook_search: Searches cells for a keyword, showing which cell matches were found with contextual snippets. This helps the agent know which cell to read/edit when asked to modify something.notebook_edit_cell_output: Allows direct manipulation and setting of cell outputs.notebook_bulk_add_cells: Adds multiple cells to a notebook in a single operation.notebook_get_server_path_context: Provides detailed server path configuration (allowed_roots, OS path style, SFTP status, project directory validation, and path construction guidance).
This project has both Python package dependencies and potentially external system dependencies for full functionality.
- Python Version: 3.10+
- Core:
mcp>=0.1.0,nbformat>=5.0,nbconvert>=6.0,ipython,jupyter_core,paramiko>=2.8.0,fastmcp>=2.3.4,uvicorn>=0.20.0,starlette>=0.25.0. These are installed automatically when you installcursor-notebook-mcpand provide support for all transport modes (stdio, Streamable HTTP, SSE). - Optional - Development/Testing:
pytest>=7.0,pytest-asyncio>=0.18,pytest-cov,coveralls. Install viapip install -e ".[dev]"from source checkout.
These are not Python packages and must be installed separately on your system for certain features to work:
- Pandoc: Required by
nbconvertfor many non-HTML export formats (including the intermediate steps for PDF). See Pandoc installation instructions. - LaTeX (XeLaTeX recommended): Required by
nbconvertfor exporting notebooks directly to PDF (--to pdfoption used bynotebook_exportwithexport_format="pdf"). See Installing TeX.
If these external dependencies are missing, the notebook_export tool may fail when attempting to export to formats that rely on them (like PDF). Be sure to install them if you plan to use these features.
The standard installation command will install all necessary dependencies to support stdio, Streamable HTTP, and SSE transport modes.
- Using pip:
pip install cursor-notebook-mcp
- Using uv:
uv pip install cursor-notebook-mcp
-
Clone this repository:
git clone https://github.com/jbeno/cursor-notebook-mcp.git # Or your fork
cd cursor-notebook-mcp
-
Create and activate a virtual environment (recommended):
# Using Python's venv
python -m venv .venv
source .venv/bin/activate  # On Windows use `.venv\Scripts\activate`

# Or using uv (if installed)
# uv venv
# source .venv/bin/activate # On Windows use `.venv\Scripts\activate`
-
Install in editable mode with all optional dependencies:
- Using pip:
# Installs the package in editable mode along with test dependencies.
pip install -e ".[dev]"

# To install in editable mode without extra test dependencies:
# pip install -e .
- Using uv:
# Installs the package in editable mode along with test dependencies.
uv pip install -e ".[dev]"

# To install in editable mode without extra test dependencies:
# uv pip install -e .
- Using pip:
This section details how to run the cursor-notebook-mcp server and configure Cursor to use it, depending on the chosen transport protocol.
With Streamable HTTP, you run the server process manually, and Cursor connects to it over the network. This is the recommended method for most setups involving Cursor.
First, ensure the package is installed (e.g., pip install cursor-notebook-mcp or uv pip install cursor-notebook-mcp) and your virtual environment is active if running from source.
- Using the installed script:
cursor-notebook-mcp --transport streamable-http --allow-root /path/to/your/notebooks --host 127.0.0.1 --port 8080
- Running from a source checkout (ensure dependencies are installed, e.g.,
pip install -e .oruv pip install -e ., or with.[dev]if you need test tools too):Remember to replacepython -m cursor_notebook_mcp.server --transport streamable-http --allow-root /path/to/your/notebooks --host 127.0.0.1 --port 8080
/path/to/your/notebookswith the actual path to the directory you want the server to access.
Go to Cursor Settings > MCP > Add new global MCP server. Or create or update your ~/.cursor/mcp.json (global) or .cursor/mcp.json (project-specific) file:
{
  "mcpServers": {
    "notebook_mcp": {
      "url": "http://127.0.0.1:8080/mcp"
    }
  }
}
Note: Adjust the host, port, and path (/mcp is the default for FastMCP's streamable HTTP). The server must be running before Cursor attempts to connect.
SSE is now considered a legacy transport, but it's still supported. Streamable HTTP is preferred for new setups. With SSE, you also run the server process manually.
Ensure the package is installed (e.g., pip install cursor-notebook-mcp or uv pip install cursor-notebook-mcp) and your virtual environment is active if running from source.
- Using the installed script:
cursor-notebook-mcp --transport sse --allow-root /path/to/your/notebooks --host 127.0.0.1 --port 8080
- Running from a source checkout:
python -m cursor_notebook_mcp.server --transport sse --allow-root /path/to/your/notebooks --host 127.0.0.1 --port 8080
Go to Cursor Settings > MCP > Add new global MCP server. Or create or update your ~/.cursor/mcp.json (global) or .cursor/mcp.json (project-specific) file:
{
  "mcpServers": {
    "notebook_mcp": {
      "url": "http://127.0.0.1:8081/sse"
    }
  }
}
Note: FastMCP's sse transport uses /sse for the handshake. The server must be running before Cursor attempts to connect.
With stdio transport, Cursor launches and manages the server process directly. You do not run the server manually in your terminal for Cursor integration. Cursor communicates with it via standard input/output.
This method requires telling Cursor the command and arguments to start the server. Care must be taken to ensure Cursor uses the correct Python environment where cursor-notebook-mcp and its dependencies are installed.
This is reliable if you have a dedicated venv for the tool.
- If
cursor-notebook-mcpscript is in the venv'sbin:{ "mcpServers": { "notebook_mcp": { "command": "/absolute/path/to/venv/bin/cursor-notebook-mcp", "args": [ "--allow-root", "/absolute/path/to/your/notebooks" ] } } } - Using the venv's Python to run the module:
{
  "mcpServers": {
    "notebook_mcp": {
      "command": "/absolute/path/to/venv/bin/python",
      "args": [
        "-m", "cursor_notebook_mcp.server",
        "--allow-root", "/absolute/path/to/your/notebooks"
      ]
    }
  }
}
Replace /absolute/path/to/venv/... and /absolute/path/to/your/notebooks accordingly. Remember you can add other cursor-notebook-mcp arguments (like --log-level DEBUG) to the args list as needed.
Option 2: Using uv to run from a specific project's virtual environment (Recommended for projects managed with uv)
This method uses uv to execute cursor-notebook-mcp within a designated project's Python environment. It's robust as it explicitly defines the project context for uv.
Ensure uv is installed. You might need to provide the full path to the uv executable in the command field (e.g., run which uv on macOS/Linux or where uv on Windows to find it). The project directory specified for uv --directory should be the root of your project where uv manages an environment (e.g., where a .venv was created by uv venv and cursor-notebook-mcp is installed).
The following examples can be used for ~/.cursor/mcp.json (global) or .cursor/mcp.json (project-specific).
- If
cursor-notebook-mcpis an installed script in theuvenvironment:{ "mcpServers": { "notebook_mcp": { "command": "uv", "args": [ "--directory", "/absolute/path/to/your/project/with/uv/venv", "run", "--", "cursor-notebook-mcp", "--allow-root", "/absolute/path/to/your/notebooks" ] } } } - Using
uv runwithpython -m ...:{ "mcpServers": { "notebook_mcp": { "command": "uv", "args": [ "--directory", "/absolute/path/to/your/project/with/uv/venv", "run", "--", "python", "-m", "cursor_notebook_mcp.server", "--allow-root", "/absolute/path/to/your/notebooks" ] } } }
Note: For these uv examples, /absolute/path/to/your/project/with/uv/venv must be the correct absolute path to your project where cursor-notebook-mcp is installed within its uv-managed environment. The --allow-root path for notebooks should also be an absolute path for clarity and reliability. You can add other cursor-notebook-mcp arguments (like --log-level DEBUG or --port 8889) to the end of the args list for cursor-notebook-mcp or python -m cursor_notebook_mcp.server as needed.
The package includes a cursor_rules.md file that helps calibrate the agent's behavior when working with Jupyter notebooks through the MCP server. These rules ensure consistent and clean notebook actions by providing guidelines for markdown formatting, tool usage, path resolution, and more.
By default, the rules are optimized for visibility into the AI's actions as it constructs or modifies notebooks. The AI will tend to use individual tool calls for operations like adding cells, which means you can see the notebook being built cell by cell. This provides good feedback and allows you to intervene quickly if needed. However, this approach results in more tool calls, which can impact costs when using paid AI services.
To use the cursor rules:
- Open Cursor
- Go to Cursor > Settings > Cursor Settings
- Click on "Rules" in the sidebar
- You can either:
- Click "Add new rule" under "Project Rules" to apply the rules only to the current project
- Add to "User Rules" to apply them globally
If you're more concerned about cost-effectiveness and don't mind waiting to see results, you can add the following section to the rules:
8. **Efficiency Mode (Cost Optimization):**
   * Minimize tool calls as they incur API costs.
   * Use `notebook_bulk_add_cells` instead of multiple `notebook_add_cell` calls when adding multiple cells.
   * Use `notebook_read` to get the full notebook state instead of reading individual cells.
   * Only use `notebook_read_cell` when you need to verify a specific cell's content.
   * Batch related changes together when possible.
* Skip verification reads if the operation is simple and unlikely to fail.This server supports accessing and editing Jupyter notebooks stored on remote servers via SFTP (SSH File Transfer Protocol). This allows you to work on notebooks as if they were local, provided you have SSH access to the remote machine and SFTP is enabled on it.
The server uses the paramiko library to establish an SSH connection and then an SFTP session. When you specify one or more --sftp-root arguments, the server maps these remote locations to internal paths. All notebook operations (reading, writing, listing, etc.) on paths under these remote roots are then transparently handled over SFTP.
- SFTP Enabled on Remote Server: The SSH server on the remote machine must have the SFTP subsystem enabled. This is standard on most Linux/macOS SSH servers.
- SSH Access: You need valid credentials (username, password, and/or SSH key) for the remote server.
paramikoDependency: Thecursor-notebook-mcppackage includesparamikoas a core dependency, so no extra installation for this is typically needed.
For SFTP connections that require interactive authentication (e.g., password prompts, 2-Factor Authentication (2FA)/Multi-Factor Authentication (MFA) codes, SSH key passphrases), you must run the cursor-notebook-mcp server manually using a network transport like streamable-http (recommended) or sse.
This is because these prompts occur when the server starts and tries to establish the SFTP connection. If using stdio transport (where Cursor launches the server in the background), there is no way for you to interact with these prompts, and the connection will likely fail.
When you run the server manually in your terminal with a network transport, you will be prompted directly in that terminal for any required passwords, passphrases, or 2FA codes.
To configure SFTP access, you use the following command-line arguments when starting the server:
--sftp-root user@host:/path/to/remote/notebooks- Specifies a remote notebook directory. Format is
username@hostname:/absolute/path/on/server. - This argument can be used multiple times to map several distinct remote locations.
- Tilde expansion (
~) is supported for the path (e.g.,user@host:~/notebooks).
- Specifies a remote notebook directory. Format is
--sftp-password your_password_or_passphrase- (Optional) Provides the password for SSH password authentication or the passphrase for an encrypted SSH private key.
- Security Note: Supplying credentials directly on the command line can be a security risk (e.g., exposure in shell history or process lists). It is generally more secure to omit this argument and rely on interactive prompts when the server starts, or use SSH agent / key-based authentication without passphrases where possible.
--sftp-key /path/to/your/private_key- Specifies the path to your SSH private key file (e.g.,
~/.ssh/id_rsa).
- Specifies the path to your SSH private key file (e.g.,
--sftp-port port_number- SSH port for SFTP connections. Defaults to
22.
- SSH port for SFTP connections. Defaults to
--sftp-auth-mode mode:- Authentication mode for SFTP (e.g.,
auto,key,password,key+interactive). Defaults toauto.
- Authentication mode for SFTP (e.g.,
--sftp-no-agent:- Disables using an SSH agent for SFTP authentication.
--sftp-no-interactive:- Disables all interactive SFTP authentication prompts.
--sftp-no-password-prompt:- Skips password/passphrase prompt if not provided via
--sftp-password, but allows other interactive prompts (e.g., 2FA codes).
- Skips password/passphrase prompt if not provided via
Below are examples of how to start the cursor-notebook-mcp server with various SFTP authentication methods. Remember to use a network transport like streamable-http.
-
Interactively prompted for password:
cursor-notebook-mcp --transport streamable-http --host 0.0.0.0 --port 8080 \
  --sftp-root myuser@remote.example.com:/home/myuser/notebooks \
  --sftp-auth-mode password
(You will be prompted for
myuser's password when the server starts.) -
Password provided via argument (less secure):
cursor-notebook-mcp --transport streamable-http --host 0.0.0.0 --port 8080 \
  --sftp-root myuser@remote.example.com:/home/myuser/notebooks \
  --sftp-password "MySecretP@ssw0rd" \
  --sftp-auth-mode password
-
Key without passphrase (e.g.,
~/.ssh/id_rsa):cursor-notebook-mcp --transport streamable-http --host 0.0.0.0 --port 8080 \ --sftp-root myuser@remote.example.com:~/project_notebooks \ --sftp-key ~/.ssh/id_rsa \ --sftp-auth-mode key
-
Key with passphrase (interactively prompted):
cursor-notebook-mcp --transport streamable-http --host 0.0.0.0 --port 8080 \
  --sftp-root myuser@remote.example.com:/srv/notebooks \
  --sftp-key ~/.ssh/encrypted_key \
  --sftp-auth-mode key
(You will be prompted for the passphrase for
encrypted_key.) -
Key with passphrase (provided via argument):
cursor-notebook-mcp --transport streamable-http --host 0.0.0.0 --port 8080 \
  --sftp-root myuser@remote.example.com:/data/notebooks \
  --sftp-key ~/.ssh/encrypted_key \
  --sftp-password "MyPrivateKeyPassphrase" \
  --sftp-auth-mode key
- Server prompts for username/password and/or 2FA code:
cursor-notebook-mcp --transport streamable-http --host 0.0.0.0 --port 8080 \
  --sftp-root myuser@remote.example.com:~/notebooks \
  --sftp-auth-mode interactive
This scenario is for when your SSH key is encrypted with a passphrase, and the server also requires a second factor (e.g., a TOTP code) via keyboard-interactive authentication.
cursor-notebook-mcp --transport streamable-http --host 0.0.0.0 --port 8080 \
  --sftp-root myuser@remote.example.com:~/notebooks \
  --sftp-key ~/.ssh/your_encrypted_rsa_key \
  --sftp-auth-mode key+interactive
(When the server starts, you should be prompted first for the passphrase for your_encrypted_rsa_key. After successfully entering it, if the server requires further interactive authentication, you will then be prompted for your 2FA code or other interactive inputs.)
cursor-notebook-mcp --transport streamable-http --host 0.0.0.0 --port 8080 \
  --sftp-root myuser@remote.example.com:~/notebooks \
  --sftp-auth-mode password+interactive
(Prompts for password, then prompts for 2FA code if required by the server.)
By default (--sftp-auth-mode auto or key), the server will try to use a running SSH agent. If your key is loaded in the agent, you might not need to specify --sftp-key or --sftp-password for the key passphrase.
- Agent with 2FA (keyboard-interactive for 2FA code only):
(Assumes key is in agent. Will prompt for 2FA if server requires it after key auth.)
cursor-notebook-mcp --transport streamable-http --host 0.0.0.0 --port 8080 \
  --sftp-root myuser@remote.example.com:~/notebooks \
  --sftp-auth-mode auto  # Or key+interactive if you want to be explicit
  # Optional: --sftp-no-password-prompt if agent handles key, but 2FA prompt is separate
You can specify --sftp-root multiple times to connect to different paths, even on different servers if they use compatible authentication methods (or if you provide specific credentials for each if the server supported per-root credential arguments, which it currently does not - all connections will try the same global credentials like password/key file if provided).
cursor-notebook-mcp --transport streamable-http --host 0.0.0.0 --port 8080 \
  --sftp-root user1@serverA.com:/projects/alpha \
  --sftp-root user1@serverA.com:~/personal_notebooks \
  --sftp-key ~/.ssh/id_serverA \
--sftp-auth-mode key- Tilde Expansion: Remote paths like
~/my_notebooksin--sftp-rootwill be expanded to the user's home directory on the remote server. - Internal Mapping: The server maps these remote SFTP paths to temporary local-like representations for its internal operations. You, as the user in Cursor, will interact with them using their original remote-style paths (e.g.,
myuser@remote.example.com:/home/myuser/notebooks/MyNotebook.ipynb). - Understanding Context with
notebook_get_server_path_context: For AI agents interacting with the server, thenotebook_get_server_path_contexttool is particularly useful. It provides details about all configured roots (local and SFTP), the server's OS path style, and guidance on how paths are constructed and resolved. This helps the AI understand how a given SFTP path relates to the user's current project directory (if local) and correctly interpret user instructions that might involve mixed local or remote path references.
Once the server is running with SFTP roots configured, you can use the notebook_mcp tools in Cursor to interact with notebooks under these remote paths just as you would with local notebooks, provided they are within an --allow-root (for local files) or a configured --sftp-root.
The server logs its operations to help with troubleshooting and monitoring.
- Default Log Location: By default, log files are stored in
~/.cursor_notebook_mcp/server.log(the.cursor_notebook_mcpdirectory is created in your user's home directory). - Custom Log Directory: You can specify a different directory for log files using the
--log-dircommand-line argument. For example:cursor-notebook-mcp --allow-root /path/to/notebooks --log-dir /custom/log/path - Log Level: The verbosity of the logs can be controlled with the
--log-levelargument. By default, the log level is set toINFO. Other available levels areDEBUG,WARNING,ERROR, andCRITICAL. Setting the level toDEBUGis particularly useful for development or deep troubleshooting as it will show extensive output, including full stack traces for all exceptions (even those that are handled by the server).
The server accepts the following command-line arguments:
--allow-root: (Required if no--sftp-rootis provided, can use multiple times) Absolute path to a directory where local notebooks are allowed.--log-dir: Directory to store log files. Defaults to~/.cursor_notebook_mcp.--log-level: Set the logging level:DEBUG,INFO,WARNING,ERROR,CRITICAL. Defaults toINFO.--max-cell-source-size: Maximum allowed size in bytes for cell source content. Defaults to 10 MiB.--max-cell-output-size: Maximum allowed size in bytes for cell output content. Defaults to 10 MiB.--transport: Transport type to use:stdio,streamable-http, orsse. Defaults tostdio.streamable-httpis recommended for web;sseis a deprecated alternative.--host: Host to bind the Streamable HTTP or SSE server to. Only used with--transport=streamable-httpor--transport=sse. Defaults to127.0.0.1.--port: Port to bind the Streamable HTTP or SSE server to. Only used with--transport=streamable-httpor--transport=sse. Defaults to8080.--sftp-root user@host:/path/to/remote/notebooks:- Specifies a remote notebook directory via SFTP. Can be used multiple times.
- See the "Editing Remote Notebooks via SFTP/SSH" section for detailed usage and authentication.
--sftp-password your_password_or_passphrase:- (Optional and not recommended for security) Provides the password for SSH authentication or the passphrase for an encrypted SSH private key. It is generally more secure to omit this and enter credentials via interactive prompt if needed.
--sftp-key /path/to/your/private_key:- Path to your SSH private key file for SFTP authentication.
--sftp-port port_number:- SSH port for SFTP connections. Defaults to
22.
- SSH port for SFTP connections. Defaults to
--sftp-auth-mode mode:- Authentication mode for SFTP (e.g.,
auto,key,password,key+interactive). Defaults toauto.
- Authentication mode for SFTP (e.g.,
--sftp-no-agent:- Disables using an SSH agent for SFTP authentication.
--sftp-no-interactive:- Disables all interactive SFTP authentication prompts.
--sftp-no-password-prompt:- Skips password/passphrase prompt if not provided via
--sftp-password, but allows other interactive prompts (e.g., 2FA codes).
- Skips password/passphrase prompt if not provided via
- Workspace Root Enforcement: The server requires the
--allow-rootcommand-line argument during startup. It will refuse to operate on any notebook file located outside the directories specified by these arguments. This is a critical security boundary. - Path Handling: The server uses
os.path.realpathto resolve paths and checks against the allowed roots before any read or write operation. - SFTP Authentication Security: When connecting to remote notebooks via SFTP, it is highly recommended to use network transports (
streamable-httporsse). This allows the server to interactively prompt you for credentials such as passwords, SSH key passphrases, or 2-Factor Authentication (2FA) codes directly in your terminal. This method is more secure than providing sensitive information via command-line arguments (e.g.,--sftp-password), as it avoids exposing credentials in your shell history or system process lists. The server supports various authentication flows, including multi-factor combinations like certificate + 2FA or password + 2FA, by leveraging these interactive prompts. - Input Validation: Basic checks for
.ipynbextension are performed. - Cell Source Size Limit: The server enforces a maximum size limit (configurable via
--max-cell-source-size, default 10 MiB) on the source content provided tonotebook_edit_cellandnotebook_add_cellto prevent excessive memory usage. - Cell Output Size Limit: The server enforces a maximum size limit (configurable via
--max-cell-output-size, default 10 MiB) on the total serialized size of outputs returned bynotebook_read_cell_output.
- No Cell Execution: This server cannot execute notebook cells. It operates solely on the
.ipynbfile structure using thenbformatlibrary and does not interact with Jupyter kernels. Cell execution must be performed manually by the user within the Cursor UI (selecting the desired kernel and running the cell).
If you encounter any bugs, have feature requests, or other issues, please check the existing issues or submit a new one on our GitHub issue tracker.
Check the GitHub Issues tab for a list of currently known issues.
- UI Refresh Issues: Occasionally, some notebook operations (like cell splitting or merging) may succeed at the file level, but the Cursor UI might not show the updated content correctly. In such situations, you can:
- Close and re-open the notebook file
- Save the file, which might prompt to "Revert" or "Overwrite" - select "Revert" to reload the actual file content
- No Checkpoint Support: When the agent makes edits using third-party MCP tools, it does not register a checkpoint in the AI chat history with a "Restore Checkpoint" button. To mitigate against this:
- Use git to frequently commit and allow for rollback
- Create manual copies of your work at key milestones
- No File/Line Context: Cursor does not share the Jupyter notebook context automatically as it does with other files. In other files (Python, Markdown) it shares the current file and line number with the AI agent. However, for notebooks, it does not share any context. Ideally it would share the cell and the line number within that cell. To work around this:
- When you know, try to be explicit about which cell, function or section you want to edit
- The agent can use
notebook_get_outlineto get a rough outline of the notebook. This will help it identify which cells have key classes, functions or markdown headings. - The agent can use
notebook_searchto determine which cells contain keywords, classes, or functions.
To submit a new issue:
- Visit the jbeno/cursor-notebook-mcp Issues page.
- Click on "New Issue".
- Provide:
- A clear description of the problem or feature request.
- Steps to reproduce the issue (if applicable).
- Expected vs. actual behavior.
- Your environment details (OS, Python version,
cursor-notebook-mcpversion, etc.). - Any relevant error messages or logs.
- Which model and client/version you're using (if relevant to an AI interaction).
Contributions to improve the Jupyter Notebook MCP Server are welcome!
If you'd like to contribute, please fork the repository, create a branch for your changes, and then open a Pull Request (PR) to the main branch of jbeno/cursor-notebook-mcp.
Ensure your changes include:
- Relevant unit tests for new functionality.
- Updates to documentation (
README.md,CHANGELOG.md) if your changes affect usage or add features. - Adherence to the existing code style.
Please ensure all tests pass by running the test scripts (./run_tests.sh or .\run_tests.ps1) before submitting your PR.
Discussion for Major Changes: For significant changes or new features, it's a good idea to open an issue first to discuss your proposed changes and ensure they align with the project's goals.
First, clone the repository and set up a virtual environment. Then install the package in editable mode with all development and testing dependencies:
- Using pip:
# From the project root directory
python -m venv .venv
source .venv/bin/activate  # On Windows use: .venv\Scripts\activate
pip install -e ".[dev]"
- Using uv:
# From the project root directory
uv venv
source .venv/bin/activate  # On Windows use: .venv\Scripts\activate
uv pip install -e ".[dev]"
The project uses pytest for unit testing. Test files are located in the tests/ directory. When adding new tests, please place them in this directory, following the existing naming conventions (e.g., test_*.py).
To run the tests, use the provided wrapper scripts. These scripts run test files individually, which helps prevent potential hanging issues that can sometimes occur when running pytest directly across all test files in this project, especially with asynchronous operations or SFTP tests.
- On Linux/macOS: Use the wrapper script to ensure environment variables are set correctly.
./run_tests.sh
# To run specific tests:
# ./run_tests.sh tests/test_notebook_tools.py
- On Windows: Use the PowerShell wrapper script.
.\run_tests.ps1
# To run specific tests:
# .\run_tests.ps1 tests/test_notebook_tools.py
Code coverage is automatically calculated when running tests via the wrapper scripts (run_tests.sh or run_tests.ps1), using pytest-cov.
Detailed coverage reports are available on Coveralls. You can view the current coverage status via the badge at the top of this README or directly at https://coveralls.io/github/jbeno/cursor-notebook-mcp?branch=main.
In addition to the automated unit tests, the repository includes a test_plan.md file. This document outlines a series of scenario-based tests designed for execution by an AI agent, such as Cursor in Agent Mode or a similar conversational AI with access to the notebook_mcp tools.
To use it, you can instruct your AI agent to "execute the test plan found in test_plan.md." The plan covers a wide range of notebook operations, from basic editing to SFTP access and metadata changes, helping to verify the practical usability and correctness of the tools in realistic, multi-step workflows. The test plan has instructions that account for different operating systems (macOS/Linux or Windows).
This project is licensed under the Creative Commons Attribution-NonCommercial-ShareAlike 4.0 International License. See the LICENSE file for details.
Copyright © 2025 Jim Beno
This work is licensed under a Creative Commons Attribution-NonCommercial-ShareAlike 4.0 International License.

This project was created and is maintained by Jim Beno - jim@jimbeno.net